Replacing caravan entry doors is an interesting job because, on the surface, it seems very simple, however it is quite involved and there are many opportunities to make mistakes. That being said, in theory anyone could do this – you don’t need qualifications to work on the door as you do with gas or 240V electricity.
1. UNSCREW THE OLD DOOR AND REMOVE IT
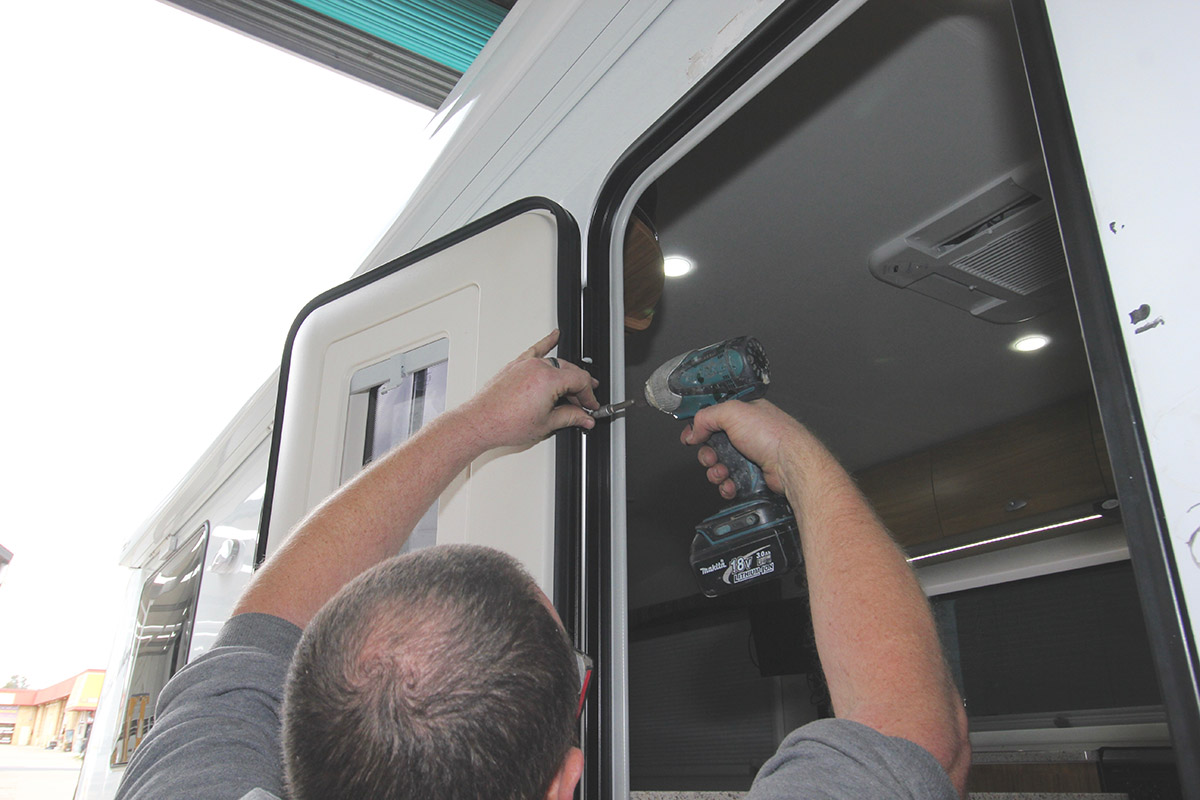
The first component of this job is disassembly of the original door, starting with removing the door from the frame at its hinges.
2. REMOVE THE INTERNAL FINISHING STRIPS
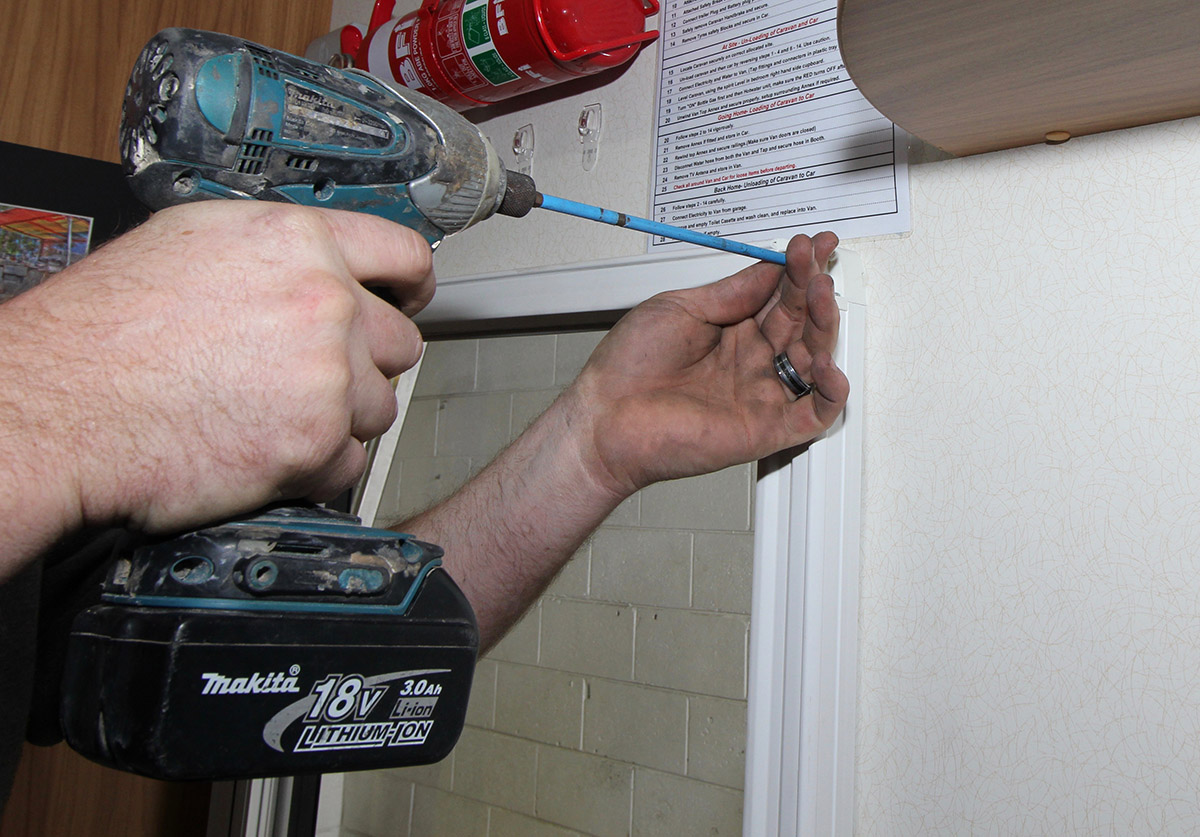
Then the internal door frame cover can be removed by firstly removing its decorative covering strips then the frame cover itself can be unscrewed from the wall and removed.
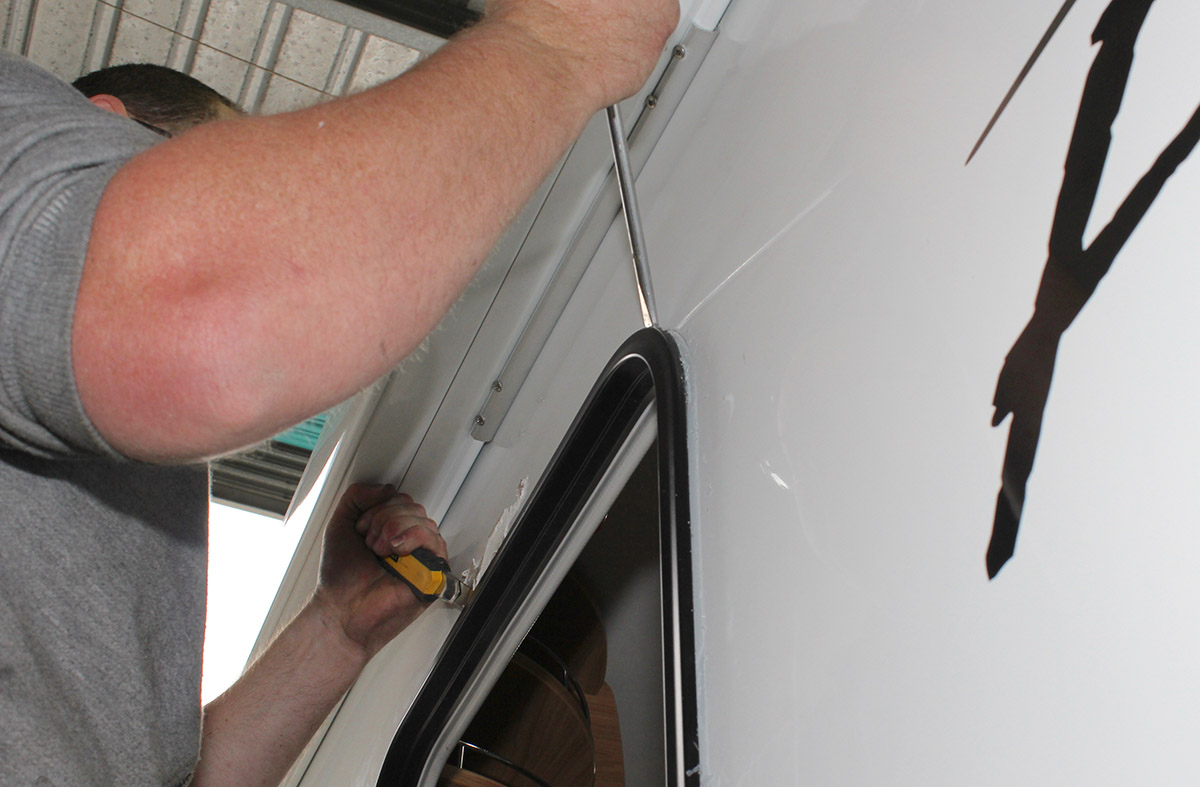
3. CUT THROUGH THE FRAME
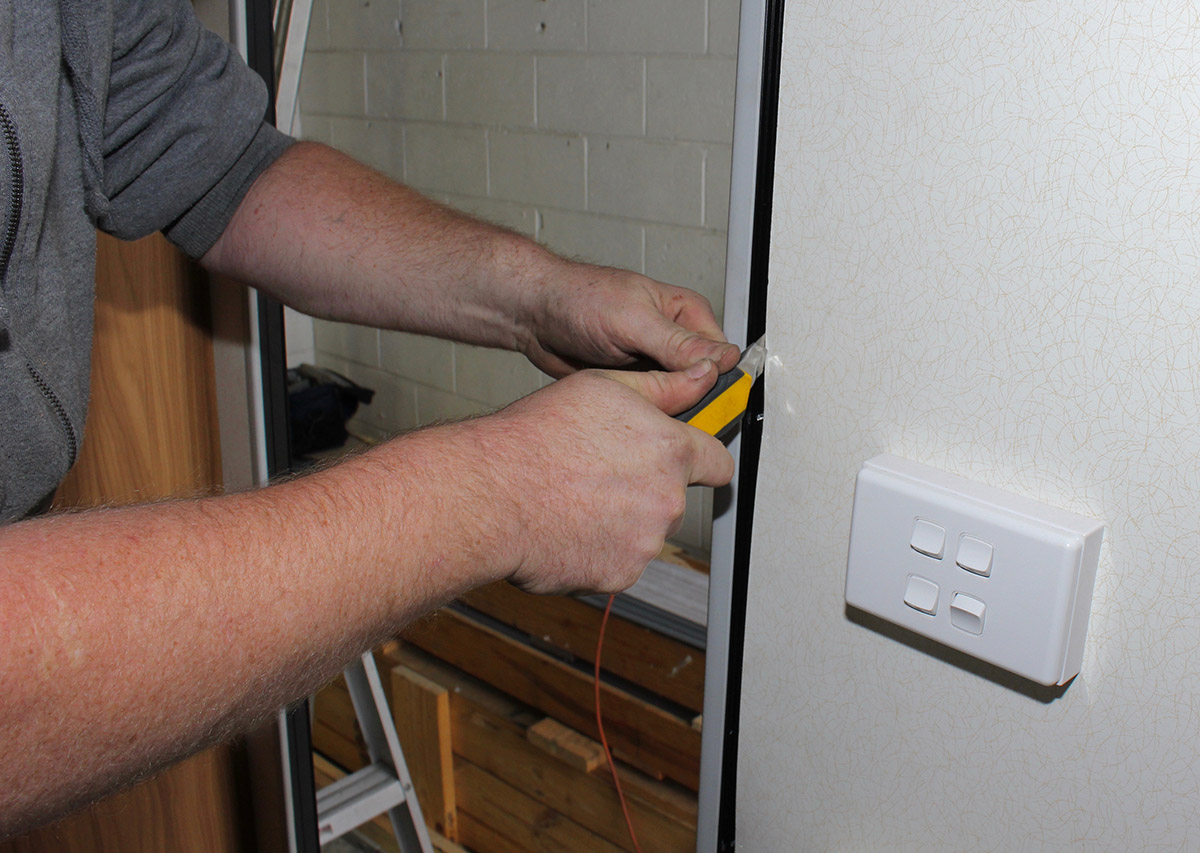
Then the frame – which is bonded into position – needs to be cut out of the door aperture with a box-cutting knife. Most of the glue can be cut through on the inside.
4. REMOVE THE FRAME
Then carefully prise the door out of the aperture from outside the van.
5. REMOVE INSULATION AND REROUTE ANY WIRING
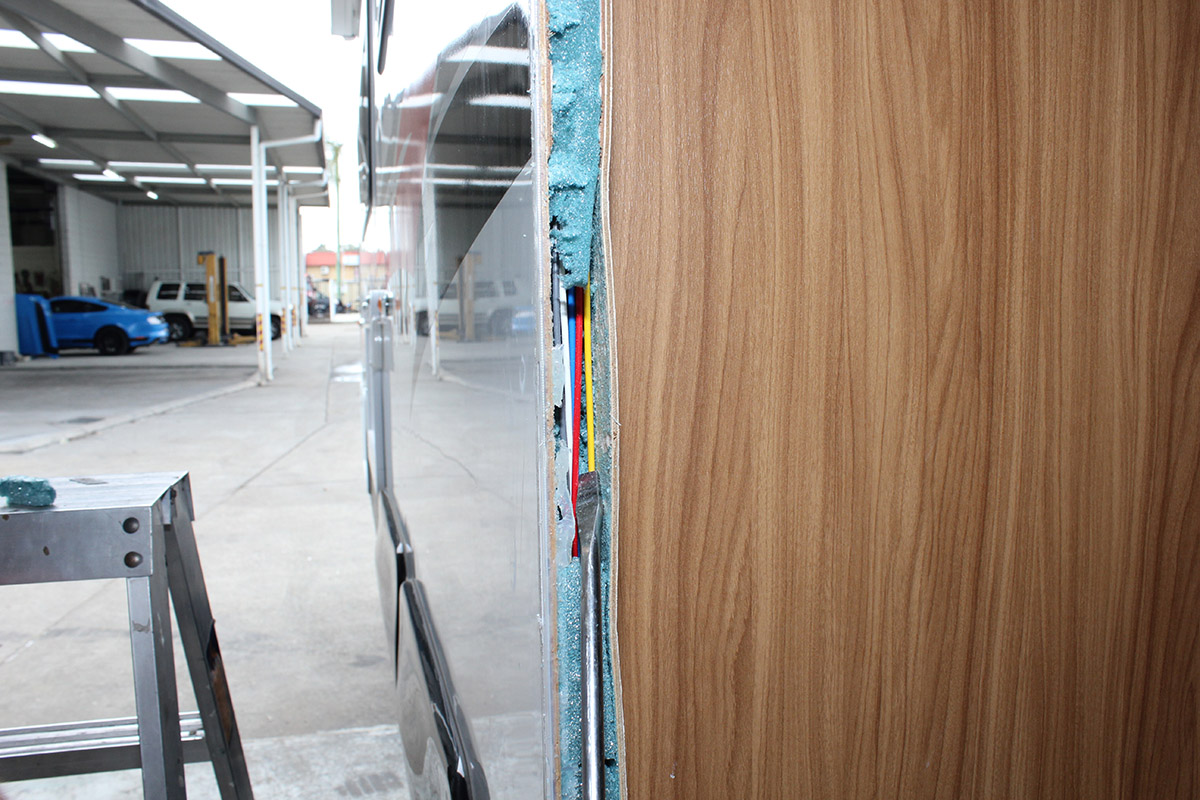
With the old frame removed, work can start on preparing the aperture for the new door. Firstly you have to check for wiring, to make sure it is recessed enough to not be damaged when cutting out the side wall to accommodate the new door (or by being pinched by the new door frame or the screws that secure it). In this case, there was only wiring in the forward side of the door aperture only (often, if a coach light is fitted, there will also be wiring plumbed down the rear side of the door aperture).
The insulation between the inner and outer wall skins was trimmed back, allowing for not only the bigger aperture we were about to cut but also for the timber that would be glued in later to secure the new door.
6. MEASURE THE APERTURE TO FIT THE NEW DOOR
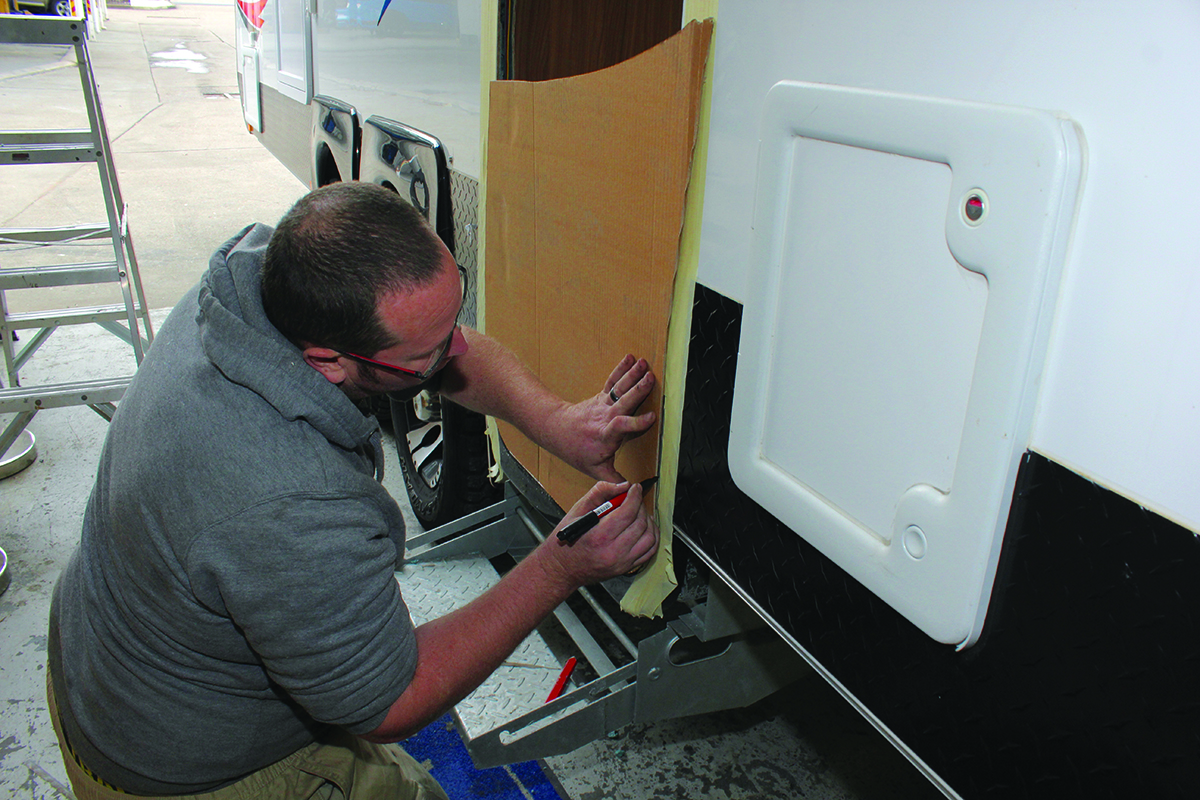
Now to the most difficult part of this job – measuring exactly how much of the side wall that will need to be cut out. Clearly you don’t want to get this part of the job wrong, because if you cut out too much or don’t get the cut straight, you’ll have unsightly sealant showing between the frame and the side wall at best, and have to make up a gasket of sorts to cover the gap around the frame in a worst-case scenario. The new door was 21mm wider and 15mm taller, and was not completely square. This meant that measurements had to be checked and rechecked. In addition, a cardboard template was made of the top and bottom of the new door to ensure the radiuses we were about to cut for the new door were correct.
Then it was time to apply a couple layers of tape around the door aperture, so when the new opening was cut with the jigsaw it would not damage the outer wall skin. Then the cut lines were marked from measurements we’d already taken.
7. USE A JIGSAW TO CUT OUT THE APERTURE
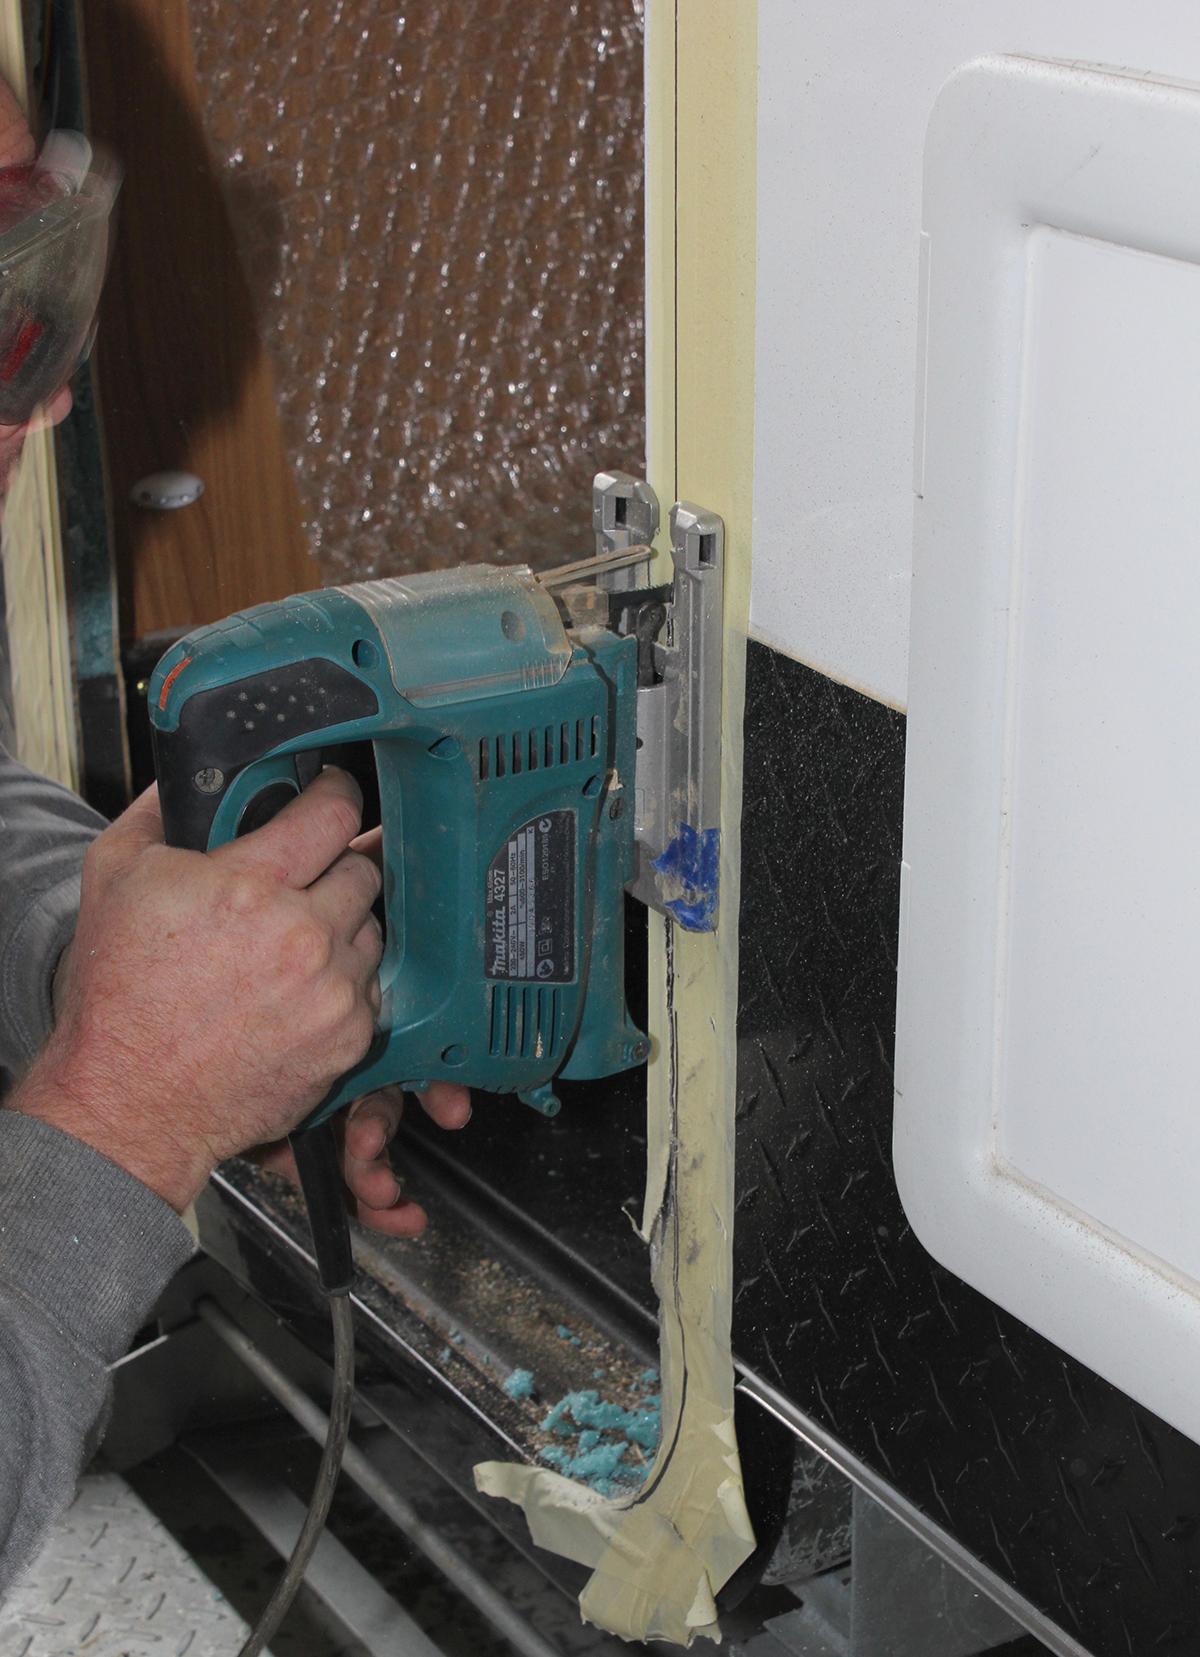
This is the point of no return, so careful checking of all measurements is vital. We took plenty of time on this step, slowly going over the measurements we’d calculated several times. The cut lines we’d marked on the masking tape we checked against our calculations. Using an electric jigsaw, the new door opening was then cut. Even though using a jigsaw is quicker and easier than a hand-held saw, you can still get the cut wrong if you’re not careful. A slow, steady cut – to make sure you don’t wander off the marked cut line – will make sure that your cut is straight (or a neat curve, as the case might be). Don’t rush it, or you’ll find that your new door opening is slightly wavy.
8. INSERT TIMBER SO THE DOOR CAN BE SCREWED IN
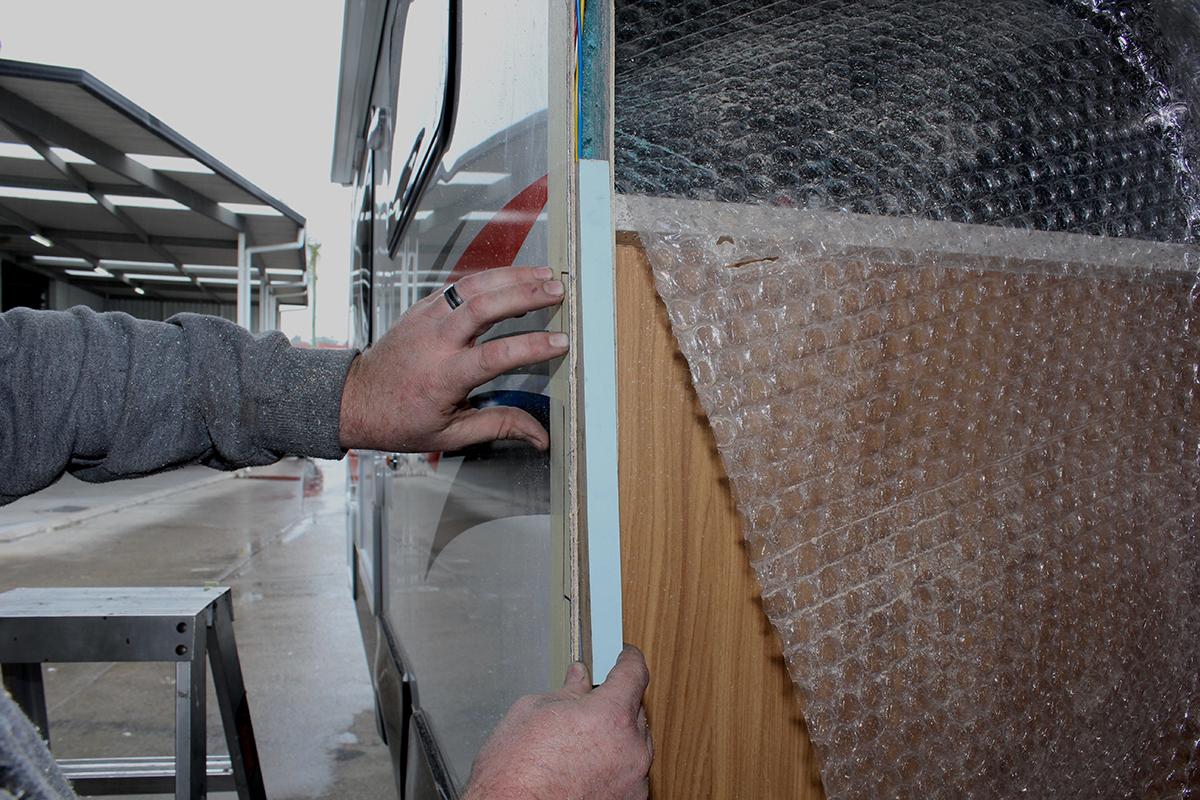
With the new opening cut, it’s time for a quick trial-fit with the new door. Using a tool such as Dremel, you can grind out any areas that have been cut out too narrow – hopefully though, like ours, the cut will be spot-on. Because the new door is both glued in and secured with screws on forward and rear sides, it needs pieces of timber glued in between the inner and outer skins so that the retaining screws have something to bite into. The insulation is cut out a bit more to make room for the timber, which is then glued in place.
The tape used to mark out the cut is now removed and the opening cleaned up, removing any debris, and the cut-out is given a quick wipe with wax and grease remover around the outer periphery to ensure a good seal.
9. GLUE THE DOOR FRAME
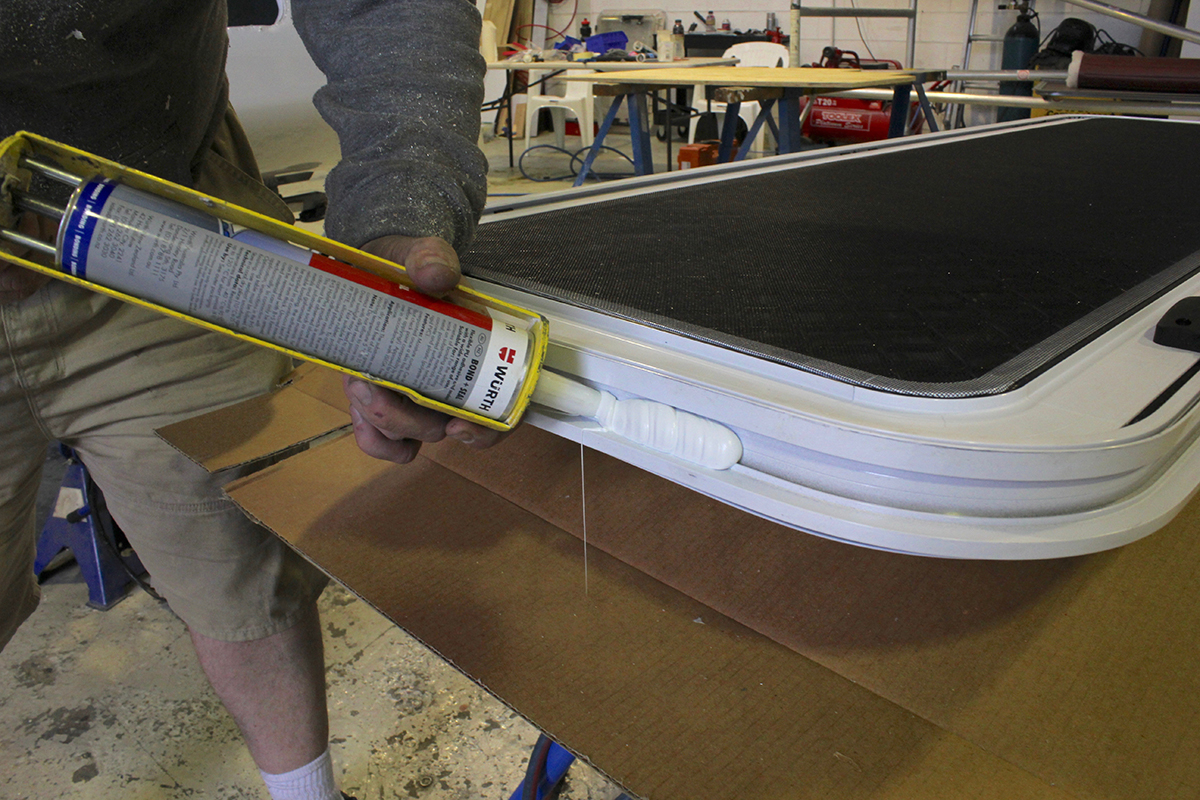
Now polyurethane glue is applied to the new door’s outer frame, then the door is fitted to the opening in the caravan wall. To help keep the door securely in place while the glue sets, holes are drilled around the new door frame and screws are then fitted. The excess glue is removed from around the frame, and the door left overnight so that the glue can cure.
10. FIT THE NEW DOOR IN
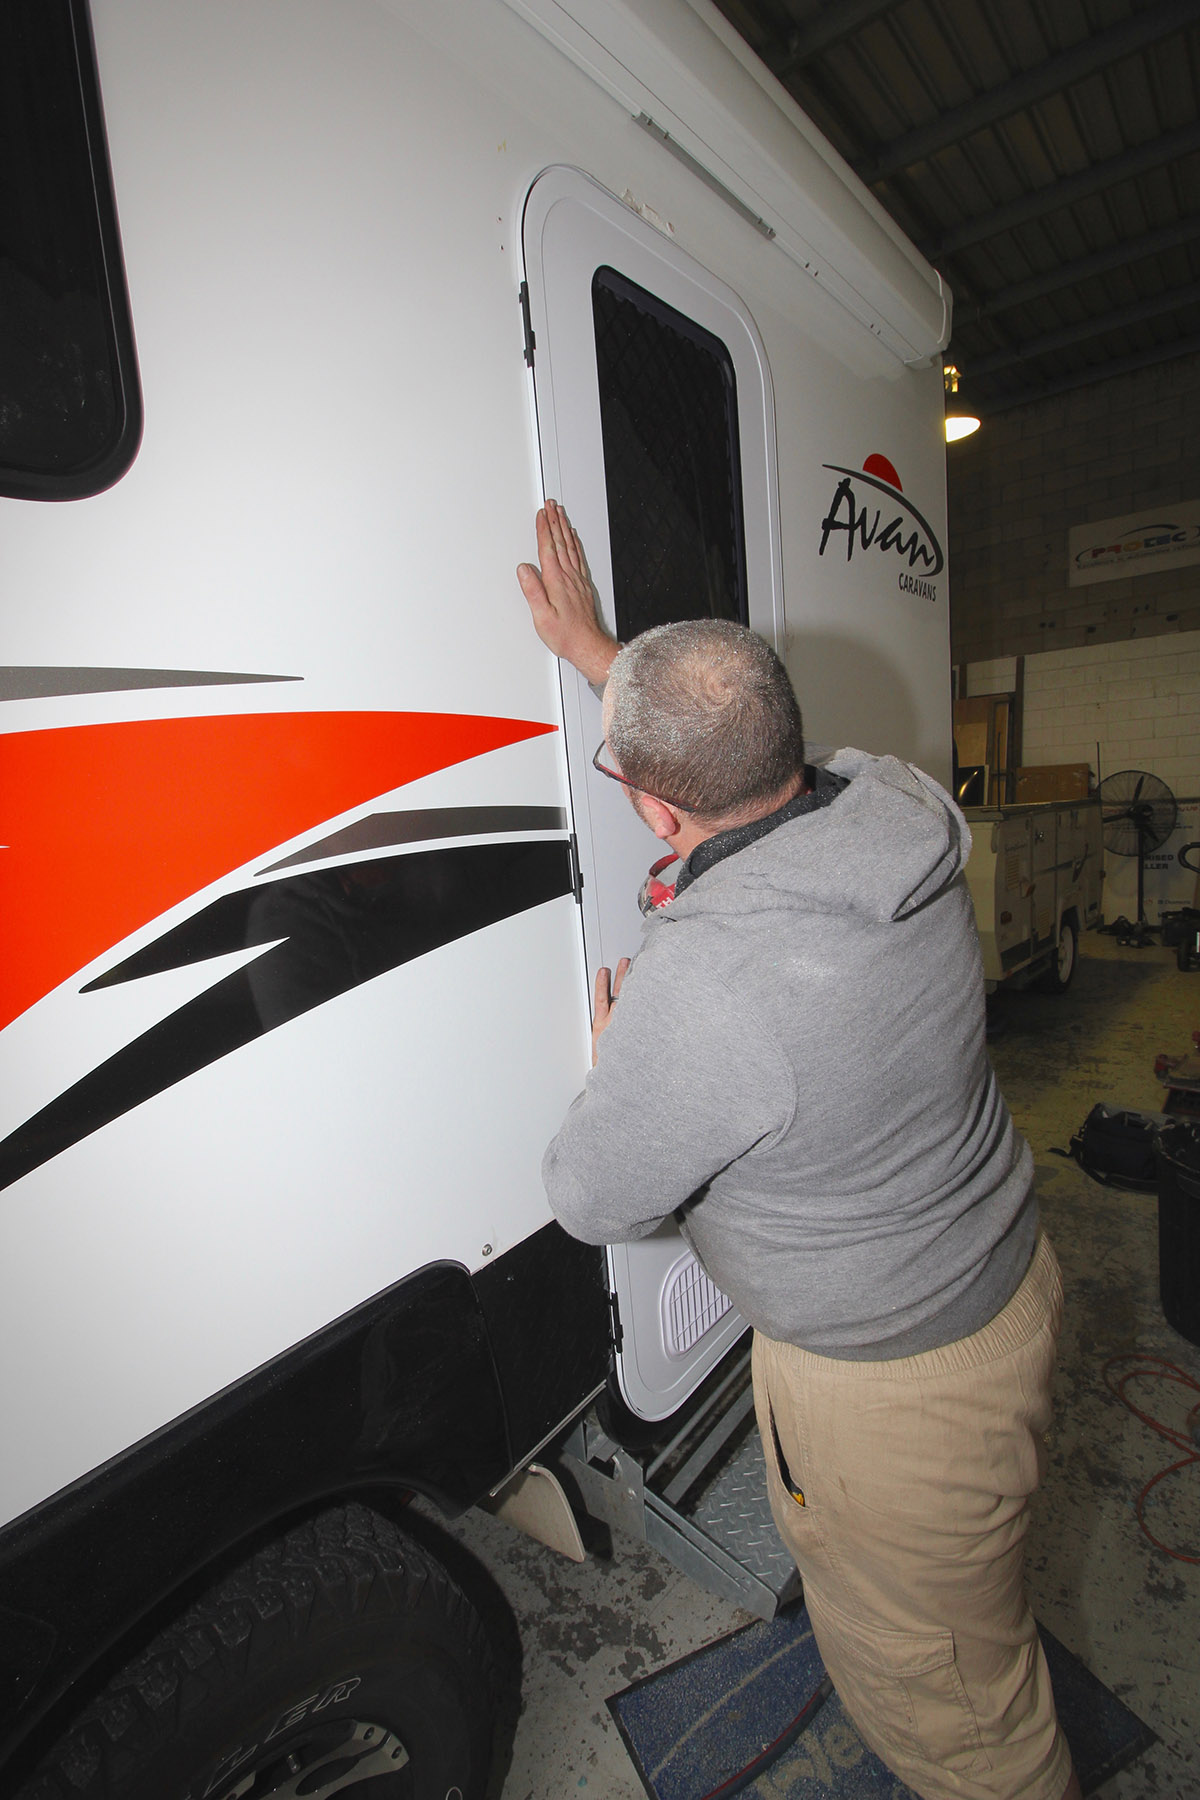
With the glue set, the door can be finished off. Glue is applied to the inner door opening as an additional barrier between the inside and the wall cavity, then a T-mould finishing strip fitted to the inner door frame to hide the join. Heat is applied with a heat gun to stop the T-mould from curling on the corners of the door frame. Now matching white rivets are fitted in place of the retaining screws we used earlier on the outer door frame. These go some way to help secure the door in place but their key purpose is to provide a neater finish to the exposed door frame. Finally, a pencil is used to mark the sides of the outer door frame so that when the screws are fitted to the front and rear of the frame that they pull the frame evenly. The screws are fitted and the pencil markings wiped off. Then there’s a final check to see that the door doesn’t catch on the frame and that it latches and locks properly.
MEET THE AUTHOR

Philip Lord
Phil is a long-term vehicle tow-tester and also the former owner of a 1979 Viscount Grand Tourer, which he restored before selling it to make room for his next project: a mid-1980s Windsor Windcheater.
Phil has been a motoring writer for more than 20 years. He has tackled most automotive and technical subjects throughout his media career, which has seen him contribute to such illustrious journals as Caravan World, Camper Trailer Australia, Wheels, 4X4 Australia and Motor.